Schedule Posts on TikTok Without Losing Reach
Oct 4, 2026 · 10 min read
Most advice about scheduling TikTok posts starts with the wrong fear. Creators worry that an automated upload will be treated as less valuable than a video published manually, when the more serious risk is operational: the post goes live in the wrong time zone, the wrong content type is queued, or the native scheduler just doesn't support the campaign workflow.
A reliable system treats scheduling as a delivery process, not an algorithm shortcut. You still need strong creative, an audience-aware publishing window, and a review loop for watch time, completion rate, and shares. Automation should remove avoidable mistakes without hiding them.
The Truth About Scheduling and TikTok Reach
Scheduling is not the reach penalty many creators fear. A 2026 analysis of scheduled and manually published TikToks summarized a test across 202 videos and reported no reach difference between scheduled and manually published posts. The operational takeaway is clear: TikTok is not primarily judging whether a person or a scheduler clicked publish.
Viewer response carries more weight. Completion rate, shares, rewatches, and other engagement-quality signals influence distribution far more than the upload method. Scheduling cannot rescue a weak opening, and manual publishing cannot compensate for releasing a strong video while the audience is inactive.
Practical rule: Automate the clock, not the judgment.
Where scheduling fails in practice
Time-zone misalignment creates the most common scheduling failure. Depending on the tool, the publishing time may follow the account owner's computer, the scheduler's default, or a profile setting. If that configuration differs from the audience's location, a post can go live during a low-activity period even when the selected time appears correct.
The same Zoomsphere analysis reports engagement drops of up to 25% for off-peak publishing, though the effect varies by niche and region. Treat that figure as an operational warning, not a guaranteed result for every account. Audience behavior, regional habits, and the video's quality all affect the outcome.
Native tools introduce another risk: limited control over campaign workflows. A queue may not support the approval steps, content variations, or monitoring process your team needs. Build a check before publishing rather than assuming a scheduled post will run as intended.
Before queuing a batch, confirm the account time zone, scheduler time zone, and audience's local time. After publication, review average watch time and completion rate. If those metrics weaken, verify the launch hour before changing the creative strategy. Reliability comes from checking the delivery system, not from abandoning automation.
Using the Native TikTok Desktop Scheduler
TikTok's built-in scheduler is a sensible starting point for a creator with a straightforward publishing routine. It gives you a direct way to upload a standard video, add the publishing details, and release it later without relying on a separate platform.
The trade-off is limited planning capacity. Current coverage of TikTok's native scheduling limits describes the feature as available to Creator and Business accounts, generally accessed through a desktop or browser workflow, with native scheduling commonly capped at 10 days ahead. That makes it useful for short queues, but awkward for long campaigns, recurring launches, and approvals involving several people.
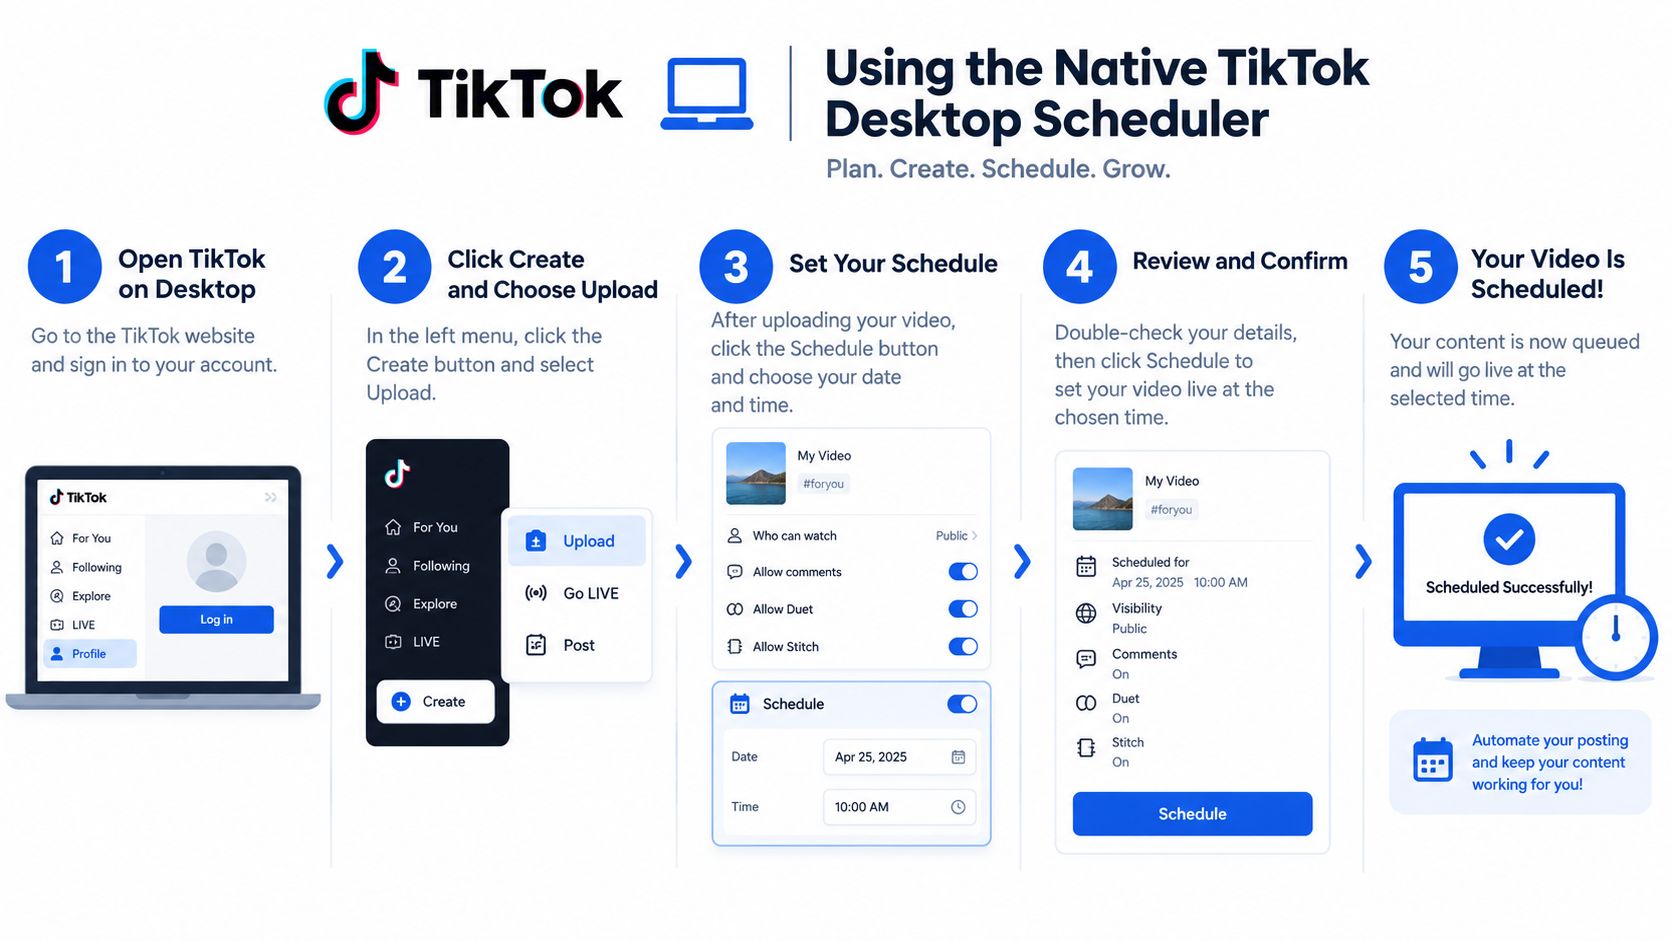
The desktop publishing path
Use this sequence when you want to schedule a post natively:
- Open TikTok in a desktop browser. Sign in to the account that will publish the video.
- Select the upload option. Add the finished video file rather than relying on a mobile draft.
- Complete the post details. Write the caption, add relevant hashtags, and choose the cover frame if the interface provides that option.
- Turn on scheduling. Find the schedule control in the upload settings, then select the intended date and time.
- Confirm the queue entry. Check the displayed time and date before saving the scheduled post.
The final review matters because native tools don't always make the broader campaign context visible. You may see the individual scheduled upload without seeing how it fits beside other channels, launch dates, or approved assets.
The native workflow also isn't designed for every content format or planning requirement. It generally leaves teams without a unified campaign calendar, long-horizon coordination, or a simple way to compare TikTok's queue with other short-form channels. Recent coverage of TikTok's scheduling updates also highlights the practical issue of scheduling in the computer's time zone, which can create problems for accounts serving audiences across regions.
For occasional publishing, those boundaries may not matter. For a team running a campaign, they create manual checks at every stage. Use the native scheduler when simplicity is the priority. Move to a broader workflow when the queue, approval process, or time-zone requirements become harder to manage than the videos themselves.
Scaling Workflows with Third-Party Automation
Native scheduling works one post at a time. That model breaks down when a team needs to coordinate multiple accounts, adapt one campaign idea for several networks, or review a complete publishing calendar before anything goes live.
A third-party workflow adds a planning layer around TikTok. Instead of opening a separate upload screen for each post, a team can draft content in a central calendar, assign a status, and move an item from draft to approval to queued publication. The important distinction isn't automation for its own sake. It's visibility.
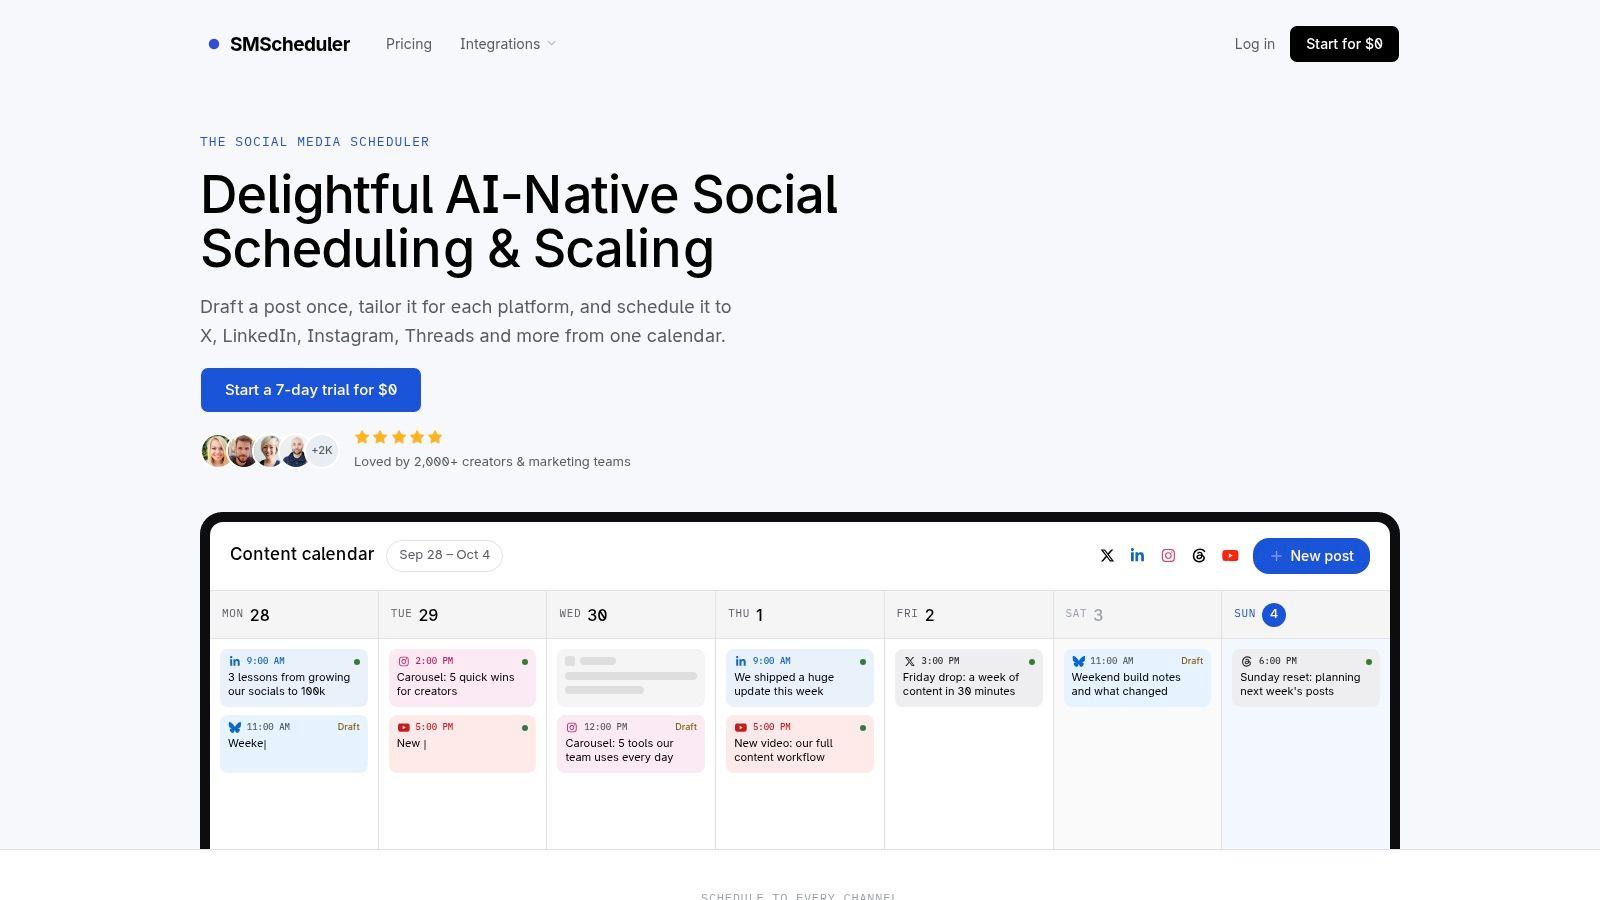
Native scheduling versus a shared calendar
| Workflow need | Native TikTok scheduler | Unified third-party calendar |
|---|---|---|
| Occasional TikTok uploads | Suitable | Suitable |
| Planning beyond the native window | Constrained | More flexible, depending on the tool |
| Multiple account coordination | Manual | Centralized |
| Cross-platform adaptation | Separate workflows | One planning surface |
| Approval visibility | Limited | Statuses and review stages |
| Campaign-level overview | Minimal | Calendar-based |
The strongest operational advantage is the ability to draft a core idea once, then tailor the copy, media treatment, and format for each network. A TikTok caption shouldn't automatically be pasted into an Instagram Reel or YouTube Short. Each channel needs its own presentation, even when the underlying concept is shared.
A visual week view also makes conflicts easier to catch. You can spot several posts clustered in one audience window, identify gaps in a campaign, and drag a queued item to a different slot without maintaining a second spreadsheet. Automated status tracking reduces the risk of someone assuming a post is approved when it's still a draft.
A TikTok scheduling workflow for cross-platform planning is most useful when the team needs one calendar for drafting, tailoring, scheduling, and reporting. It doesn't remove the need to inspect the final video or validate the publishing settings. It reduces the number of places where those checks can be forgotten.
Identifying Your Unique Best Posting Times
Generic “best time” charts are starting points, not operating instructions. Audience location, niche, account type, and viewing habits can shift the strongest window substantially. Weekend performance is especially inconsistent across broad analyses, so copying a universal slot can create false confidence.
Independent benchmark summaries commonly place strong engagement in weekday afternoons and early evenings, with Tuesday through Thursday around 2–6 p.m. local time appearing as a recurring cluster. Other large analyses find stronger Saturday or Sunday windows for some audience segments and account types, as summarized in this overview of TikTok posting-time research. The disagreement is useful. It shows why your own follower activity should outrank a global chart.
Build a testable schedule
Start inside TikTok Analytics. Export or record follower-activity hours, then group the available windows by local audience time rather than by the time zone of the person managing the account.
A practical test sequence looks like this:
- Choose several candidate windows. Include weekday-afternoon slots and at least one weekend or late-evening window if your activity data supports it.
- Schedule test posts across 2–4 weeks. Keep the publishing process consistent so timing isn't mixed up with a completely different workflow.
- Compare the right outcomes. Review views, watch time, completion rate, and shares by publish slot.
- Separate timing from creative. A weak hook can make a good time look ineffective, while a strong video can hide a weak time slot.
- Keep the winning pattern provisional. Recheck it as the audience, region, and content mix change.
For a deeper planning routine, use this guide to plan a month of content around repeatable publishing windows. The aim isn't to discover one permanent “best time.” It's to learn whether your audience behaves more like the weekday-afternoon cluster or the weekend and late-evening cluster, then schedule with enough discipline to validate the choice.
Technical Requirements and Pre-Flight Checks
A scheduled post can publish exactly as instructed and still fail operationally. The file may be wrong, the caption may contain an error, the account may use an unexpected time zone, or the content may need a last-minute review that the queue doesn't provide.
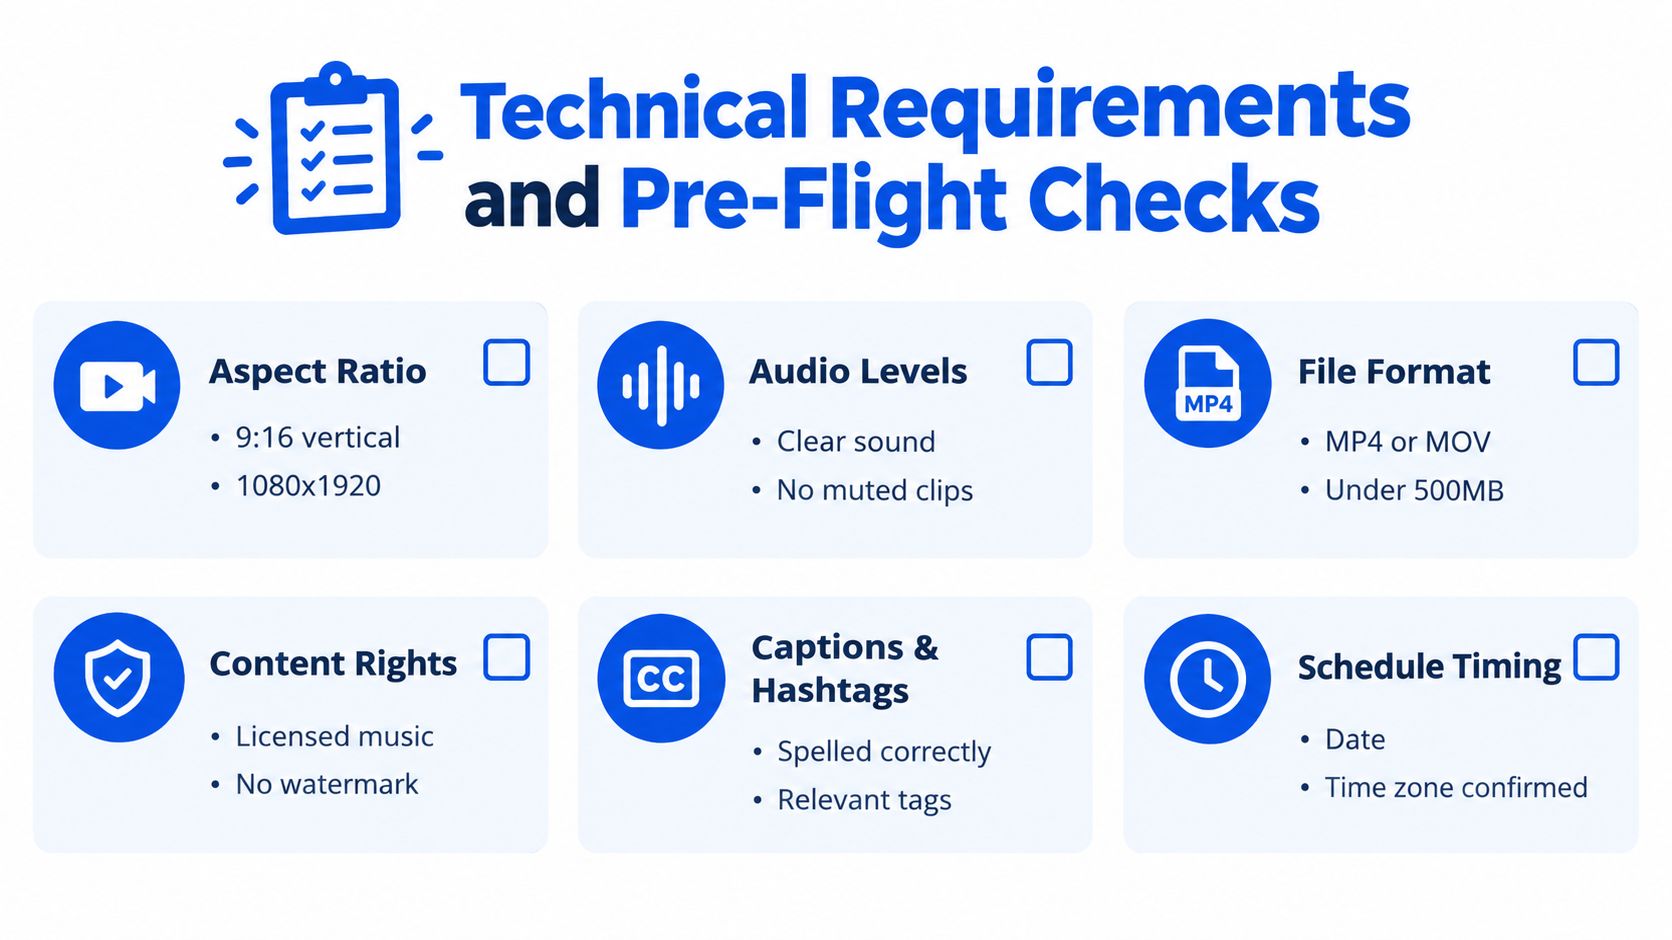
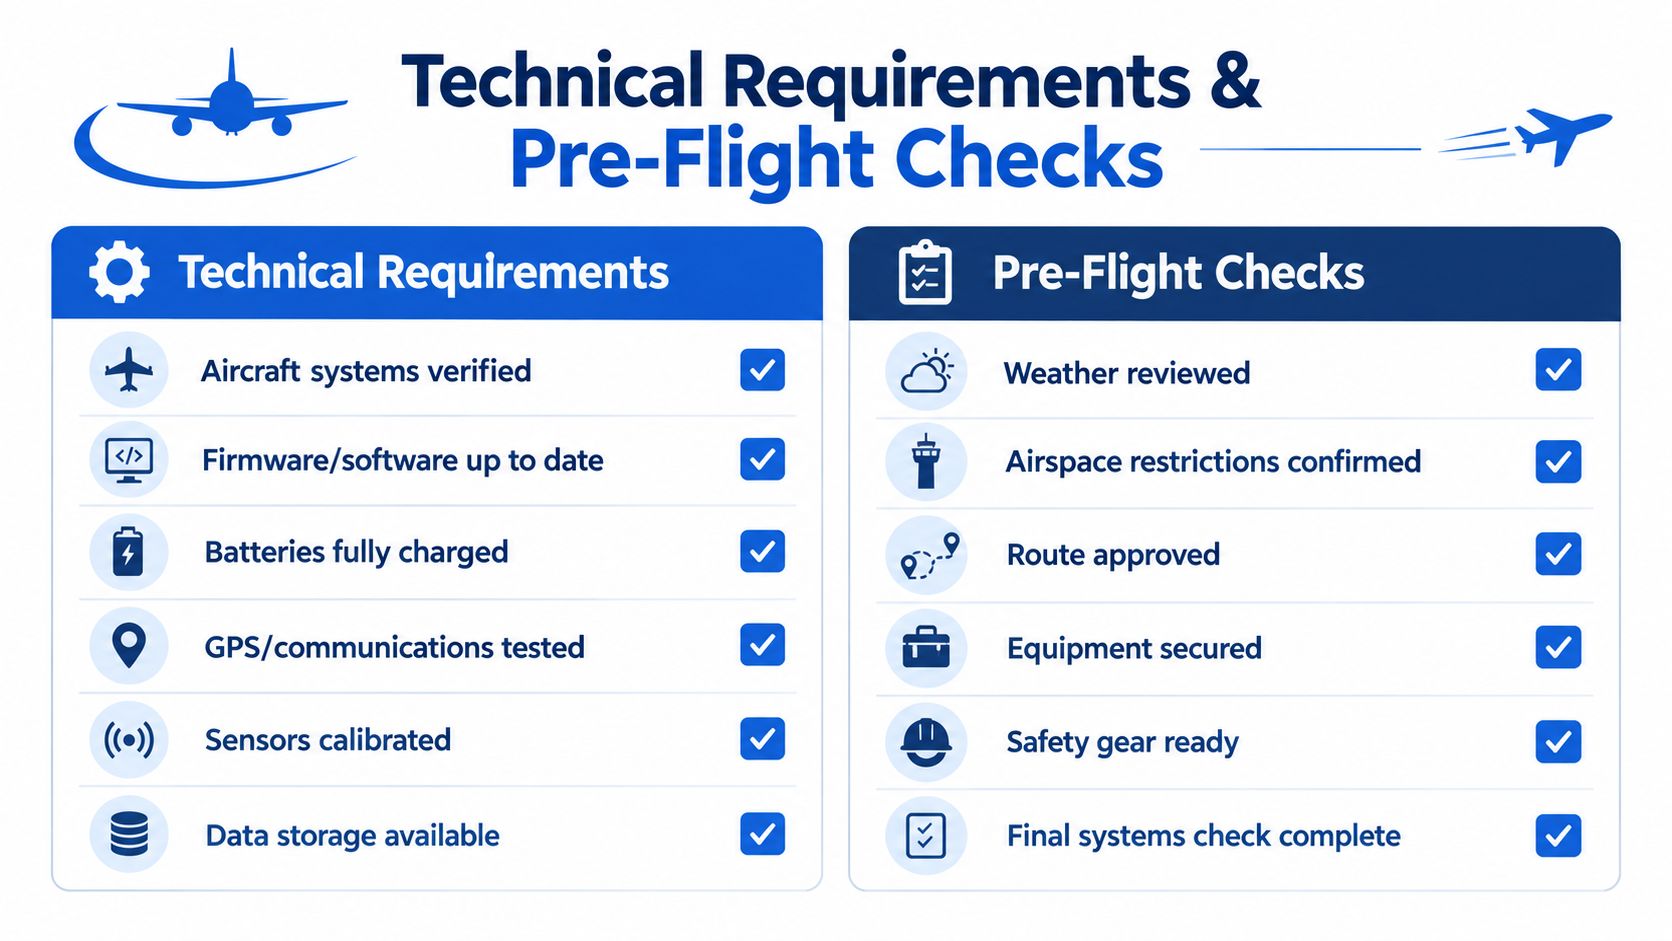
Use a pre-flight checklist before approving any batch. The exact requirements can vary by publishing path and account setup, so verify them in the destination interface rather than assuming that a file accepted by one tool will behave identically in another.
Review the asset before the queue
Check the finished video, not just its filename or thumbnail. Confirm that the opening is intact, the audio is present, captions are readable on a mobile screen, and the selected cover frame represents the actual subject of the post.
Then review the publishing details:
- Asset integrity: Open the uploaded preview and watch it from beginning to end.
- Caption accuracy: Check spelling, links where applicable, hashtags, mentions, and disclosure language.
- Rights clearance: Confirm that the team has permission to use the chosen footage, music, and branded elements.
- Account selection: Make sure the post is attached to the intended TikTok account.
- Time-zone settings: Verify both the account setting and the scheduler setting before confirming the queue.
- Approval state: Keep unpublished work marked as draft until the responsible reviewer signs off.
Don't assume that native features and third-party tools expose the same editing controls. A scheduled post may be harder to alter after confirmation, so catch errors before the queue rather than relying on a rescue edit minutes before launch.
Time-zone verification deserves its own sign-off because it can invalidate an otherwise correct schedule. Write the audience's local zone beside the campaign plan, compare it with the displayed scheduler zone, and make the person approving the queue confirm both. That small administrative step protects the timing test from becoming a test of configuration errors.
Measuring Performance and Refining Your Strategy
Scheduling succeeds when it creates a cleaner learning loop. Publishing at a selected time is only the first step. After each batch, compare completion rate, average watch time, views, and shares by slot and by creative type. Those metrics help distinguish a distribution problem from a weak opening, unclear structure, or poor audience fit.
Don't judge a scheduled post solely by its first result. Look for patterns across comparable videos. If videos with similar formats repeatedly perform better in one audience window, keep testing that window. If watch time stays weak across every slot, change the hook or edit before changing the calendar.
Decide which workflow fits
Use the native scheduler when you publish occasionally, work from a desktop, and can manage each upload individually. Choose a third-party calendar when you need longer campaign planning, multiple accounts, approvals, cross-platform adaptation, or a consolidated view of results.
A useful creative companion is this resource on hooks that stop the scroll. Strong scheduling can't compensate for a video that loses attention immediately, while strong creative can give your timing tests a meaningful signal.
The reliable system is simple in principle: confirm the time zone, test audience-local windows, inspect every asset, publish consistently, and use performance data to adjust both timing and creative. Automation should make that system easier to execute, not replace the checks that protect reach.
Social Media Scheduler brings drafting, per-channel tailoring, visual calendar planning, automated publishing, and performance measurement into one workflow, including TikTok scheduling alongside other major networks. Visit Social Media Scheduler to organize your publishing calendar and reduce the time-zone and coordination errors that undermine scheduled campaigns.