How to Repost Image on Instagram the Smart Way
Sep 26, 2026 · 12 min read
You're trying to repost a great image on Instagram, and the app makes it annoyingly unclear which button you're supposed to use. That confusion is normal. Instagram now gives you three real paths, native reshare, screenshot and reupload, and third-party repost apps, and each one fits a different job.
The smart way to handle how to repost image on Instagram is to stop treating it like one action. If you want clean attribution and the least friction, use the native repost path when it exists. If you need a still image in your own grid and the native option isn't available, screenshot and reupload carefully. If you're managing volume or need a faster workflow, a third-party app can help, but only if you understand the policy risk.
Why Reposting on Instagram Feels Harder Than It Should
You tap a post, want to share it, and the app gives you a paper-airplane icon, a Story option, maybe a repost control, and no obvious “save and reshare” button. That's why people keep googling how to repost image on Instagram. The interface looks simple until you're trying to reuse someone else's photo in a way that still feels clean, credited, and policy-safe.
Instagram has never made permanent feed reposting as straightforward as sharing to Stories. A widely cited guide notes that the platform historically didn't offer a native way to repost someone else's photo directly into your permanent feed, and that built-in sharing was mostly temporary sharing to Stories for up to 24 hours. For feed reposts, people relied on screenshots or downloading and uploading the image again, with permission and attribution recommended. That matters because Instagram is a huge attention channel, with one 2026 industry summary saying it exceeds 2.4 billion monthly active users worldwide and another reporting 2.99 billion monthly active users as of January 2026. HubSpot's repost guide ties those behaviors together clearly.
The three paths that actually work
The confusion exists because Instagram has shipped several different sharing behaviors at different times. Stories reshare, native Repost for public posts, and Remix on Reels all live in different parts of the app, so users assume the whole platform should work the same way.
Practical rule: choose the method based on what you're trying to publish, not on what feels easiest in the moment.
That leads to three viable workflows. Native repost is best when the post is eligible and you want the cleanest attribution. Screenshot and reupload is the fallback for still images when you need the post in your own grid. Third-party apps are for speed and volume, but they come with more policy and login risk.
Using Instagram's Built-In Repost Feature
Start with the native option whenever it's available. It's the cleanest path because Instagram handles the attribution structure for you, and you're not fighting the app to imitate a share that it already supports for eligible posts.
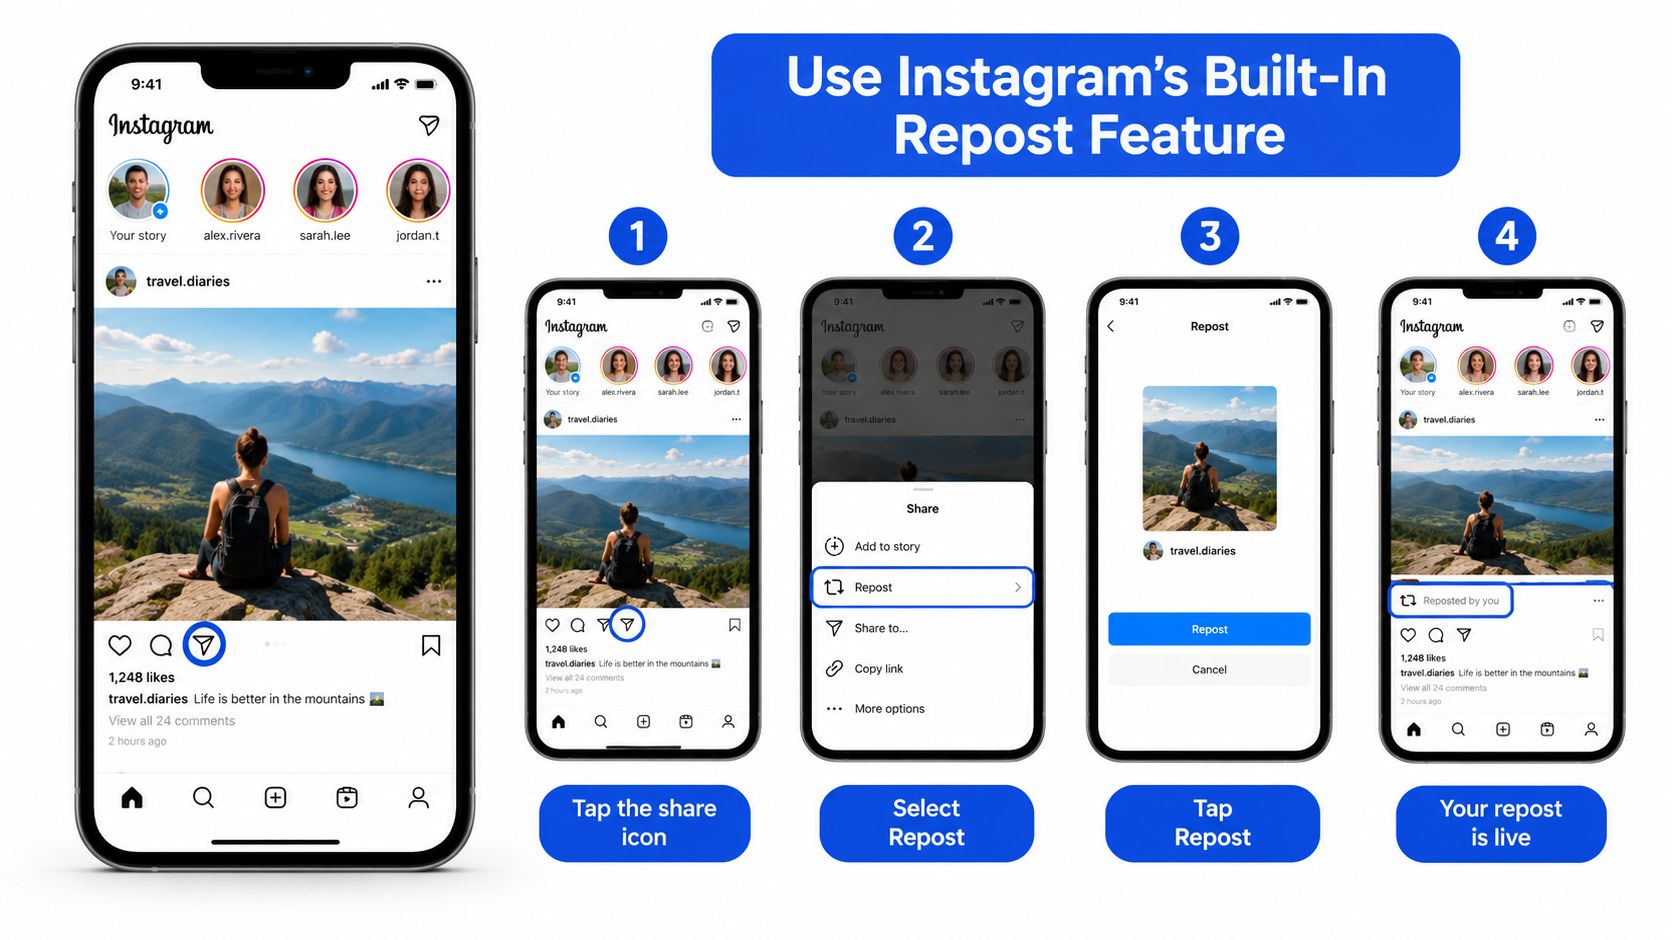
Check eligibility first
The Repost control only appears for public feed posts and Reels with creator-enabled resharing. If the account is private, the post is an ad, or the content isn't eligible for native resharing, the button won't help you. That's the point where people start forcing workarounds, and that's where mistakes usually start.
Open the post, look for the Repost icon under the action row, and confirm you're seeing the actual control rather than a Story share or a copy-link prompt. If the creator disabled resharing, don't improvise. Ask first.
Use the repost bubble correctly
When the repost option is available, tap it, add your own note in the text bubble, and save. That bubble is where your context belongs. If you're reposting as a brand, use it to explain why the post matters, not to bury the original creator under your own copy.
Followers will see the original creator's username in the header, a “Reposted from @handle” label above the caption, and the post can appear in your profile grid with a repost indicator so it's visually distinct from original content. The repost bubble disappears after you save, so write the commentary before you commit. If you remove the reshare, you also cancel its pending status.
The safest mindset is simple. Native reposting is amplification, not ownership. Even when the app preserves attribution automatically, your caption should still give credit in plain language so the source stays obvious outside the app's UI.
The cleanest repost is the one that still makes the original creator easy to find.
Reposting by Screenshot Without Losing Quality
Screenshotting is the fallback for public or private content, and it's often the only realistic route when you need a still image in your own feed, carousel, or Story. It's also the most abused method, because people treat it like a shortcut instead of a publishing workflow. That's how you end up with blurry crops, visible UI bars, and messy attribution.
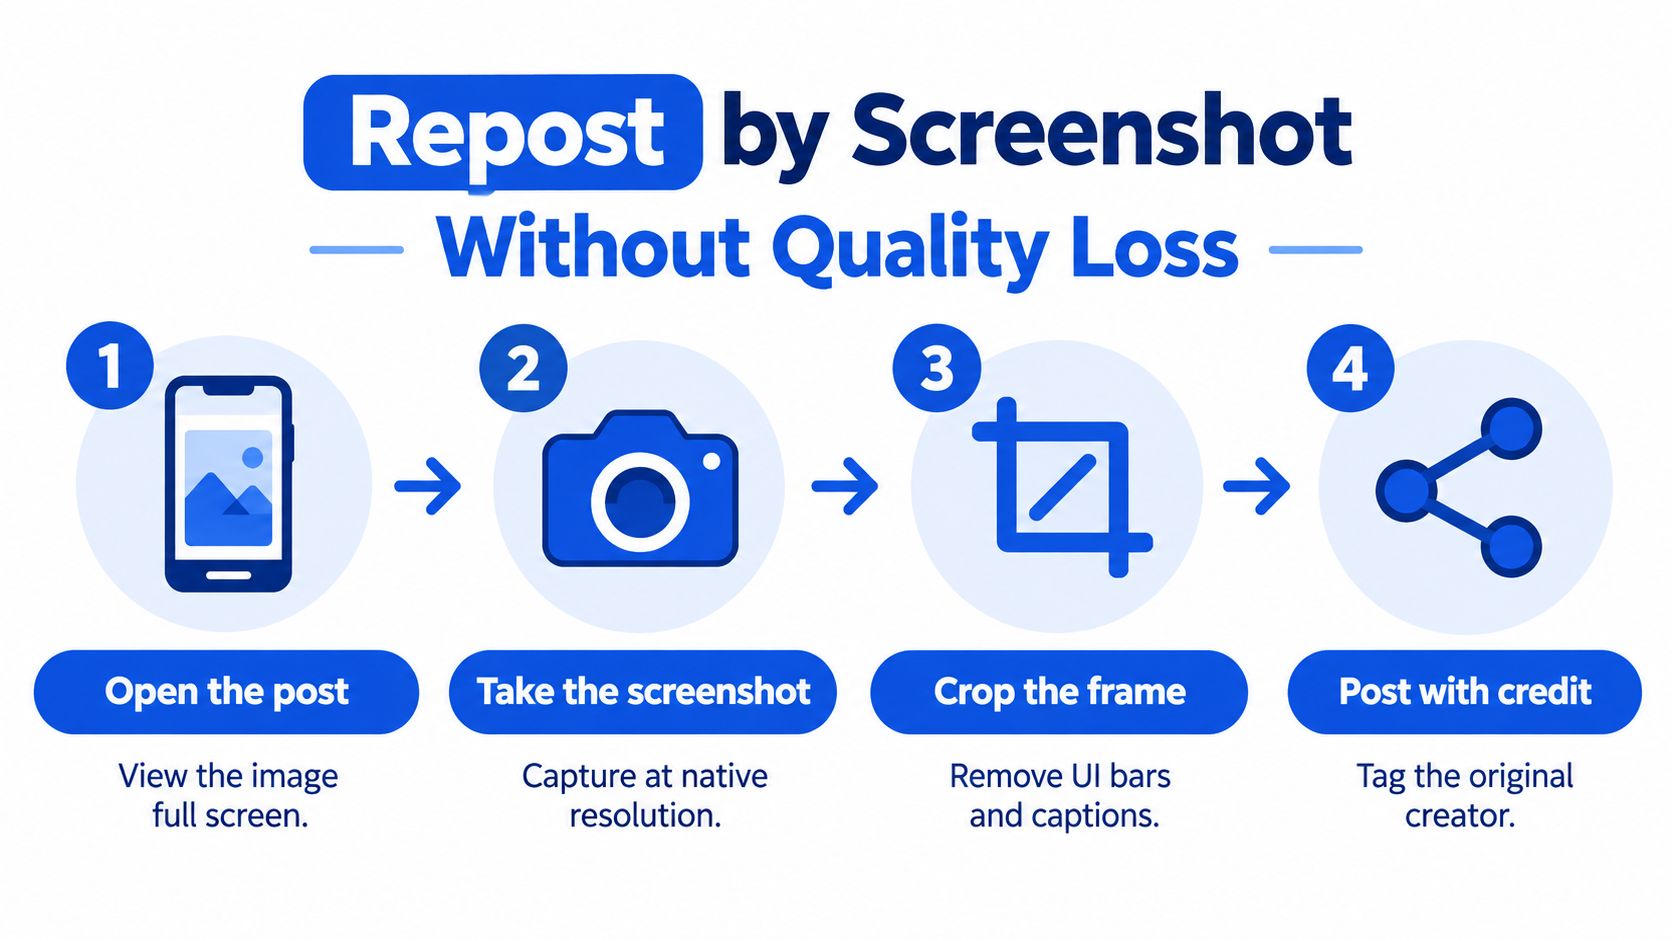
Capture cleanly before you edit
Open the image full screen before you screenshot it. Turn off obvious distractions, keep the screen brightness steady, and make sure no notifications are floating over the post. On iPhone, a 1:1 capture is easier to manage for square reposts. On Android, crop to 1080 x 1080 if you're publishing a square feed post, because that keeps the frame aligned with Instagram's common square layout.
Use Instagram's own editor to crop the screenshot if you can. Heavy third-party resizing usually softens text overlays and compresses the image more than you want. If the original has fine type or sharp graphics, every extra compression step makes the repost look more recycled.
Keep the edit honest
Don't stretch the image. Don't slap on aggressive filters to make it look like original art. If you want viewers to recognize that it's a reposted capture, leave a thin border or a subtle shadow so it doesn't pretend to be the source file.
Use screenshots only when you have a reason to, not because you're in a hurry.
Your caption matters just as much as the crop. Start with the original creator's handle, then add a plain credit line such as “Photo by @handle, repost with permission.” That keeps the attribution alive even if the post gets trimmed, shared to Stories, or repurposed later. A screenshot with bad credit is just a liability with extra steps.
Third-Party Apps Worth Your Time
Third-party repost apps exist because people want a faster workflow than manual screenshotting. I get it. For casual sharing, they can save time. For brand work, they're only worth using if they handle credit cleanly and don't create a login headache.
Here's the problem. Any app that asks for your Instagram password is relying on unofficial access paths, and that's a policy risk you don't need unless the workflow demands it. I'd treat visible watermarks the same way. If the app stamps its own branding on the repost, it's a bad fit for professional use because you'll end up cropping or editing the watermark out, which defeats the purpose.
What to look for and what to avoid
Pick the app that matches your volume. If you only repost occasionally, a lightweight utility is enough. If you manage a busy account and need repeatable sharing, look for a tool with a workflow that doesn't slow you down on every post.
| App | Watermark Handling | Login Method | Best For | Policy Risk |
|---|---|---|---|---|
| Reposta | Varies by version, check before use | Often requires account connection | Quick one-off reposts | Moderate, because third-party access can change |
| Regrann | May add branding depending on setup | Typically connected workflow | Casual reshares and simple publishing | Moderate to higher if login access is required |
| InstaRepost | Often focused on fast copy and share use cases | Usually account-based | Users who want a straightforward repost flow | Moderate, especially if access rules tighten |
For a broader publishing workflow, a scheduler with Instagram support can be a better fit than a repost-only tool, especially if you're coordinating multiple posts in one place. If that's your setup, this Instagram scheduling workflow is the kind of planning layer that reduces repeat work without forcing you into a repost app for everything.
The warning is this. Meta can tighten third-party API access without much notice, which means even a tool that works today can break later. If that happens, the fix is often boring, uninstall, reconnect, reinstall, and test again. That's not a reason to panic, but it is a reason not to build your whole workflow around one app you don't control.
Attribution, Permission, and Copyright Rules
Attribution is the line between a smart repost and a sloppy one. If you repost someone's image without clear credit, you've created a problem even if the image looked easy to share. If you repost it with obvious credit and permission, you've created a usable reference point that respects the creator and protects your account.
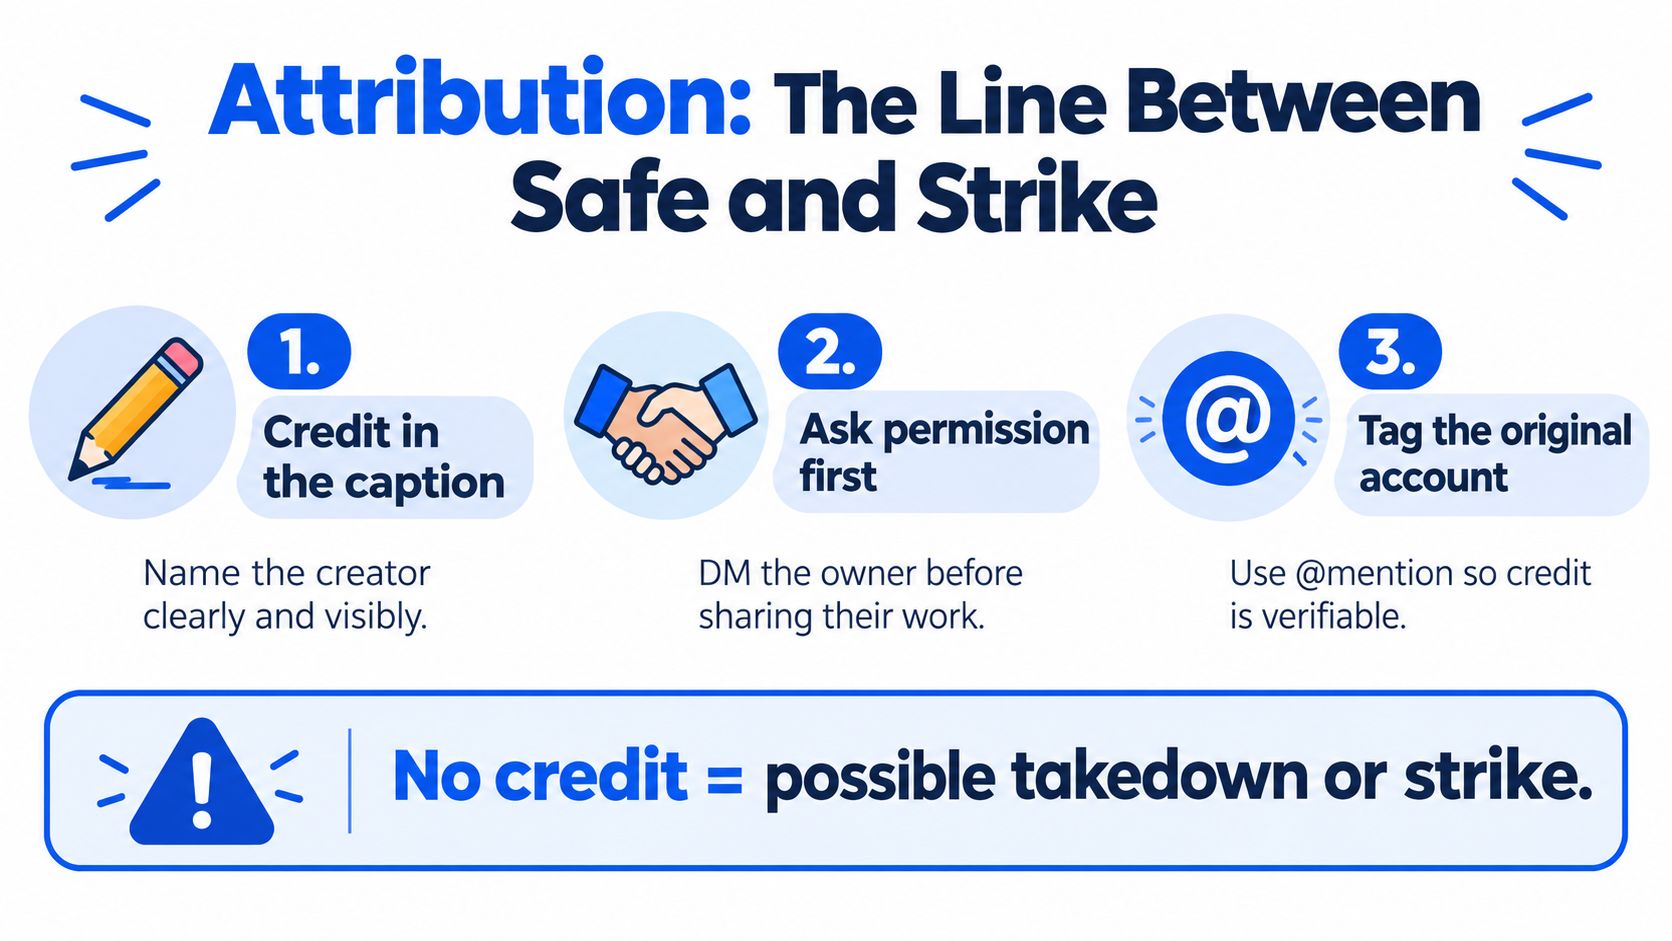
Use credit that survives the repost
The safest caption pattern is the inline credit. Put the creator's name or handle in the first line so it's impossible to miss. The second pattern is to tag the creator in both the caption and the image sticker when the format supports it. The third is the explicit permission note, which matters most for sponsored, paid, or sensitive content.
Instagram's repost feature handles attribution better than a screenshot or third-party app because the original creator stays attached to the post structure. Screenshots and reuploads don't do that for you, so you have to build the credit trail yourself.
Caption-only credit is weak. If the image gets shared, cropped, or re-posted again, the credit has to stay visible where people can actually see it.
Don't lean on fair use as a shortcut
Fair use is not a free pass to repost a whole photograph just because you added a comment. If you're republishing a full image, treat it as someone else's work unless you have permission or you're using Instagram's built-in share path. That's the honest standard. It's also the one that keeps brands out of unnecessary disputes.
For creator etiquette, I prefer this order: ask first, tag clearly, then repost. If the content is personal, sponsored, or likely to be reused in another campaign, the permission trail should be written, not implied. That one habit saves more headaches than any editing trick.
When Reposting Actually Hurts Your Feed
Not every repost helps reach. Some of them just make your grid look lazy. If your account is supposed to build a point of view, a feed full of borrowed visuals sends the opposite signal.
A feed that leans too hard on reshared material starts to look like a curation account instead of a creator account. That matters because followers come back for original perspective, not a recycling loop. The same logic shows up in Instagram's own push to reduce recommendation visibility for accounts that regularly repost content they didn't create, especially when they function like aggregators. This analysis of Instagram's crackdown on content aggregators is useful if you want to understand why originality now matters more in the feed.
Ask what the repost does to the mix
Audit the last ten posts on your account. If more than half are reshares, your feed is no longer acting like a primary source. It's acting like a relay.
That's fine for a news-style or community account. It's a weak fit for a brand that wants to be remembered for its own ideas. Reposts also blur the line between UGC and unpaid sharing, which gets messy later when you want exclusive content or cleaner partner rights.
If you need the content to spark discussion, use a comment-led quote post instead. If you need visual support, fold the inspiration into a carousel slide and add your own analysis around it. Those options give you more control than a straight repost ever will.
A One-Minute Pre-Repost Checklist
Run this before you tap share. It takes less time than fixing a bad repost later, and most repost mistakes happen because someone skipped the basic checks, not because they chose the wrong method.
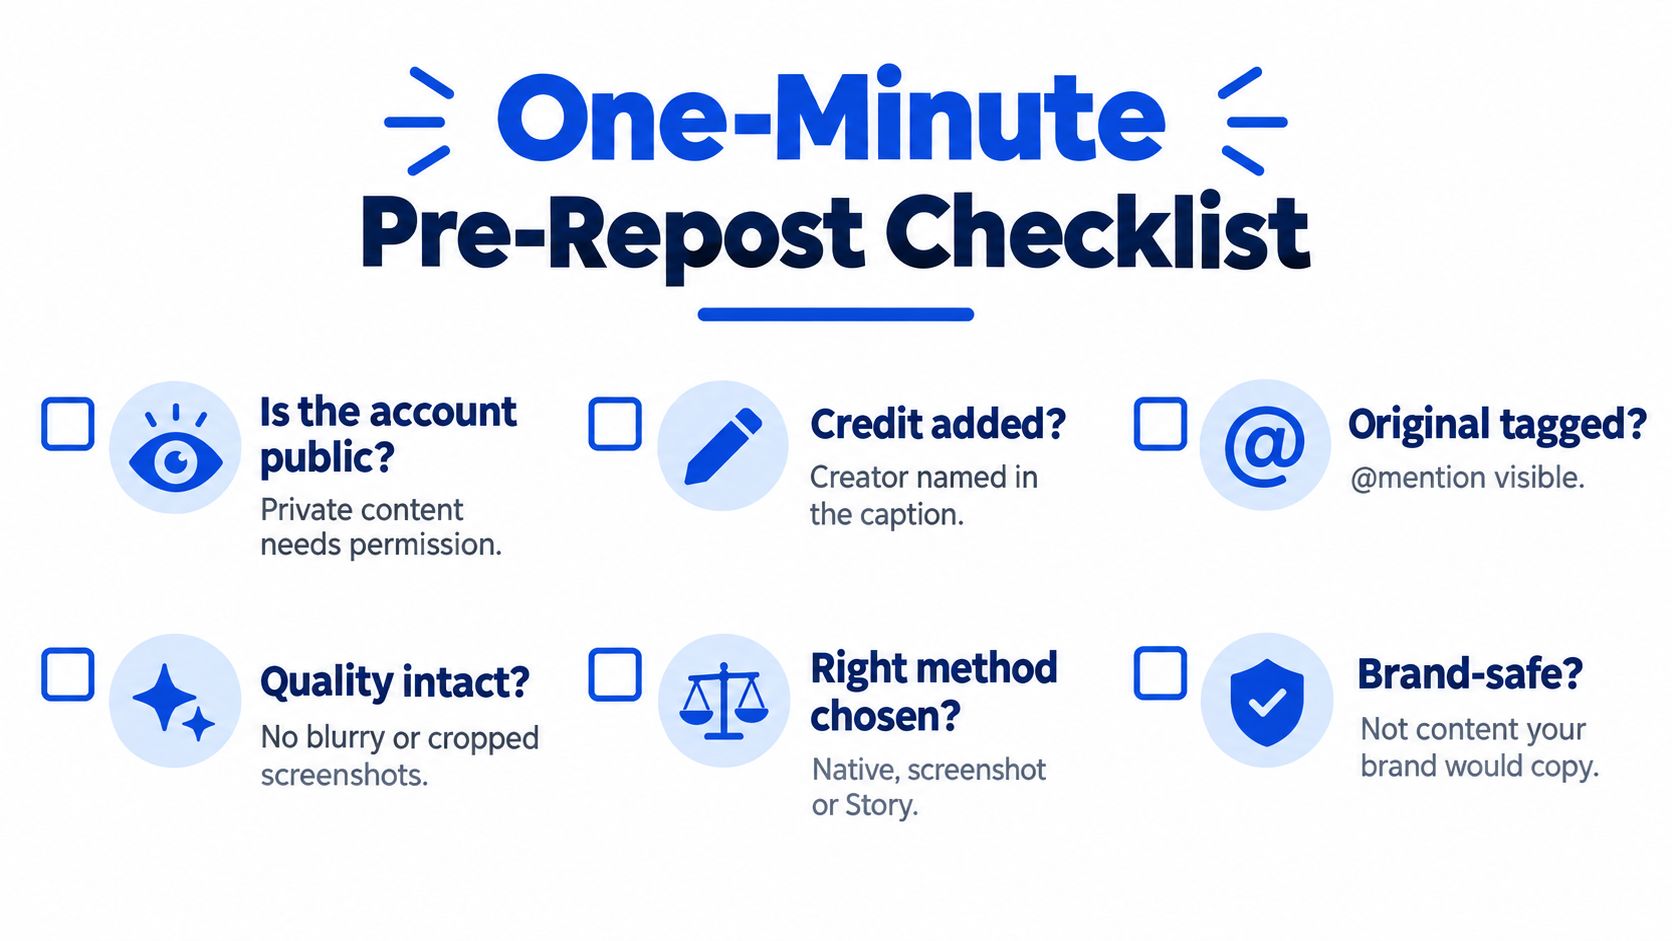
Quick checks
- Is the account public? If it's private, stop and ask for permission before you do anything else.
- Credit added? Put the creator's name in the caption where it's visible immediately.
- Original tagged? Use the @mention so the source is verifiable, not implied.
- Quality intact? Reject blurry screenshots, clipped text, or awkward crops before posting.
- Right method chosen? Use native repost when it's available, screenshot only when you need a fallback, and choose a third-party tool only when it saves time.
- Brand-safe? Skip content that clashes with your visual identity or would confuse your audience about what you stand for.
If you want a faster content workflow beyond reposting, this guide to cutting posting time is the right next read. It helps you build a publishing system that doesn't depend on last-minute sharing decisions.
Skip the checklist and you'll usually pay for it later in messy credit, weaker visuals, or a post that doesn't belong on your feed. Use the checklist and the repost becomes a decision, not a gamble.
Social Media Scheduler helps you plan, tailor, and publish social content from one calendar, which makes it easier to keep reposts intentional instead of reactive. If you're managing credit, timing, and brand fit across channels, Social Media Scheduler gives you a cleaner workflow for the rest of your posting stack.